
I LOVE Kombucha!! For anyone who hasn’t tried it, it’s definitely an acquired taste. I will never forget my first sip! It tasted tangy and sweet at the same time with a bit of effervescence. I didn’t know what to think. It took me a couple of bottles (on different occasions) to get a taste for it. But once I learned of all the benefits it offered I was hooked. Being $4+ dollars a bottle it was something that I would get occasionally, but wanted to get my hands on more for a cheaper deal. That’s when I looked into making my own. I was so excited when I saw how easy it was and how cheap! You can basically make a gallon for less than a $1 (not including supplies) In this post I’m going to share with you how easy it is to make your own kombucha and I encourage you to try it for yourself and reap the health benefits!
What is Kombucha?
Kombucha is a living health drink that consists of fermented tea and sugar. It has been known to cure a wide range of conditions such as arthritis, intestinal disorders, cancer, multiple sclerosis, insomnia, baldness and much more. The tea has been shown to boost the immune system and even reverse aging due to being high in antioxidants that attack free radicals from damaging cells. It is especially beneficial in detoxing the liver and kidneys. Kombucha is high is glucaric acid which helps to ward off cancer, contains glucosamines which prevents and treats arthritis and is also a probiotic to improve digestion, fight candida and eliminate the symptoms of depression, anxiety and fibromyalgia. All these wonderful benefits thanks to the living mushroom type bacteria culture that grows and makes this all possible!
That’s right, a living growing culture that feeds off the sugar and transforms into all sorts of wonderful health benefits! Making it was a pretty cool process, very easy, and very much like a science experiment. If you are pretty squeamish I probably wouldn’t try to make your own, but anyone who is up for it and enjoys Kombucha, I would totally try it!
What you need:
- One gallon of water (fresh purified)
- One cup of sugar (where to buy)
- 10-12 tea bags or 1oz of self bagged tea (where to buy)
- Kombucha Culture (where to buy)
- Large glass 1 gallon brew container (where to buy)
- Cheesecloth (where to buy) or Paper Towels
- Rubber band (where to buy)
- Dark warm place with good ventilation (I used a space in my garage. I wouldn’t do it in my house due to the slight smell from the fermentation process.)
- Bring the water to a boil, brew the tea, add the sugar and stir until dissolved. Turn off stove and remove pot from water.
- The water needs to completely cool, it cannot be too warm or it will kill the culture. I let mine sit for about 2 hours just to make sure its nice and cool.
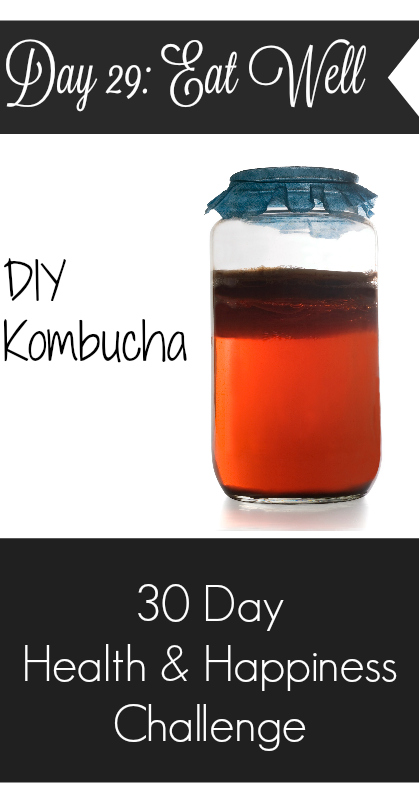
- Add the water to the brew container, add the liquid kombucha and culture. Finish by covering with the cheesecloth or paper towel and securing with a rubber band. Place the container in a warm dark place and wait for the magic to happen. The process can take 7-28 days depending on the heat and your taste preference. It grows fast at 80-85 degrees and much slower in cooler temperatures.
- In a few days you will see a solid film grow on top of your batch. This is the new “Mother” culture forming. It will most likely not be a pretty sight. It could be white, brown, lumpy and bumpy and slimy on the underside with strings of dark material. Smile! This is a sign of a healthy culture. It may float or sink and will eventually grow into thick layers which can be separated and used to batch more, shared with others or even composted.
- After 7 days you can try your kombucha and see if its ready. If you want it more bold and tangy you can keep testing it every couple of days to find the flavor that is right for you. That is the beauty of making your own! To taste, I use a straw and a small glass. I stick the straw in the brew with my finger on the top of the straw to capture the tea, and then transfer it over into the glass to taste. This helps to prevent contamination of the batch.
- Once your kombucha is ready you can remove the culture with clean hands (no gloves) and just place the culture in a bowl with about a cup of the kombucha liquid and cover with a clean cloth until you are ready to make a new batch. Or you can store the culture and liquid in a closed container and even in the refrigerator for an extended period of time.
- To bottle the kombucha you can pour it into clean jars with tight fighting lids. Fill almost all the way to the top. Next store the kombucha at room temperature for another 2-3 days to allow for the second fermentation process. You can then store your kombucha in the refrigerator for months if needed and still enjoy the same yummy flavor and natural carbonation. Make sure you don’t leave the bottles out too long as the fermentation process will continue and the bottles could explode. You can place in a fridge for a day or two and then transfer back to the pantry if you will not be consuming them right away. By placing them in the fridge you stop the fermentation process.
I had so much fun brewing my own Kombucha and will definitely make it a habit. Not only has it been a fun experience, I have felt so much more energized since I have been consuming the healthy elixir almost daily!
Have you tried Fermenting your own Kombucha yet? Share your stories!